Midnights

These cookies are for those of you for whom the chocolate, only the chocolate, and nothing but the chocolate will do. (or how I embraced chocolate as its own food group!) Makes 6 Dozen cookies.

Ingredients

  • 1 2/3 Cups bittersweet or semisweet chocolate chips or chunks (I prefer Chunks)
  • 6 Oz unsweetened chocolate
  • 16 Tablespoons (2 sticks) unsalted butter
  • 1 2/3 Cups Brown Sugar
  • 2 Large Eggs
  • 1 Tsp Vanilla Extract
  • 2 Tsp Espresso Powder
  • 3/4 Cup All-purpose Flour
  • 3/4 Cup Natural Cocoa Powder
  • 1 1/4 Tsp Salt
  • 1 1/4 Tsp Baking Soda
  • 1 2/3 Cups semisweet chocolate chips

Cooking Directions

  • In a saucepan set over very low heat, or in the microwave, melt together the first two ingredients, stirring frequently until smooth. Remove the chocolate from the heat before it’s entirely melted, which will help prevent burning. Set Aside.
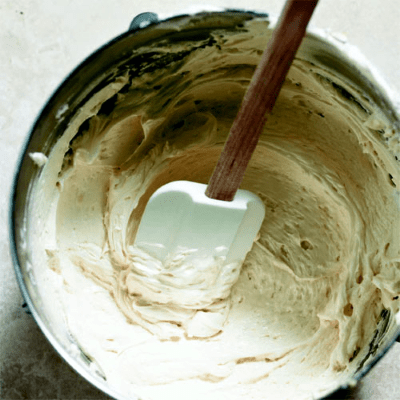
  • In a large bowl, cream together the butter and brown sugar, then beat in the eggs one at a time, scraping the bowl down and beating well after each addition. Add the vanilla, espresso powder, and reserved melted chocolate, mixing until evenly incorporated. Stir in the flour, cocoa powder, salt, and baking soda. Stir in the other 1 2/3 Cups chocolate chips. Cover the bowl and refrigerate the dough for 1 hour, or until it’s firm.
  • Preheat oven to 350°F. Lightly grease (or line with parchment) two baking sheets.
  • Drop the dough by the tablespoonful onto the prepared baking sheets. Bake the cookies for 9 minutes, until they appear set. Remove them from the oven, let rest on the baking sheet for 5 minutes, then transfer to a rack to cool completely.

**Variation

  • Substitute white chocolate chips or peanut butter chips for the semisweet chocolate chips added at the end of the recipe.

Classic French Fruit Tart

Made this a few years ago at Sur La Table, Original recipe can be found here for this lite and refreshing dessert!

Ingredients

Cooking Directions

Prepare shortcrust dough and chill according to directions (see above linked recipe)

Bake the shell:

  • Preheat the oven to 375°F and position a rack in the bottom third. Line the chilled tart shell with heavy-duty foil, pressing the foil firmly and smoothly into the crevices of the pan. Fill the pan with pie weights. Make sure the weights reach up the sides to the rim of the pan (the center does not need to be filled quite as full). Bake the shell for 20 to 22 minutes, until the foil comes away from the dough easily (if it doesn”t, bake another 5 to 6 minutes and check again). Remove the pan from the oven (hold the pan by the sides and not the bottom), close the oven door, and lift out the foil and weights from the shell; set them aside to cool.
  • Return the pan to the oven to continue baking the shell for about 10 minutes, then remove the pan from the oven, close the oven door, and check to see if any cracks have formed. If you see a crack, very gently smear a tiny bit of reserved dough over the crack to patch it-you need only enough to seal the opening. Return the pan to the oven and bake 10 to 15 minutes longer, until the crust is a nice golden brown all over. Transfer to a rack and cool completely.
  • Moisture-proof the crust: Bring an inch of water to a boil in the bottom of the double boiler. Place the chocolate in the top of the double boiler off the heat. Then place the chocolate over the steaming water. Stir occasionally with the silicone or rubber spatula until the chocolate is melted and smooth. (Or, melt the chocolate in the microwave-safe bowl) Scrape the melted chocolate into the cooled tart shell and use the offset spatula to spread it into a thin layer across the bottom and about ½-inch up the side. Chill for 10 minutes to firm the chocolate.

Fill the Tart:

  • Spoon the Vanilla Bean Pastry Cream into the tart crust and spread into an even layer. Refrigerate while you prepare the fruit. Pour the raspberries and blackberries onto the baking sheet and pick out and discard any moldy berries or debris. These berries are usually not washed, as they absorb water quickly and turn to mush. Rinse the blueberries in the strainer under cold water and pat dry. In the medium bowl, gently mix all of the berries together. Transfer to the tart, making sure there is a nice balance of all the berries in each area of the tart.

Finish the Tart:

  • Heat the raspberry jam and water in the small saucepan over low heat until melted, hot, and fluid or, microwave on low in the microwave-safe bowl. Do not let it boil or it will caramelize. Brush just enough of the melted jam over the tops of the berries to glaze them a bit. You don’t want to overdo it; simply touch the brush to the berries to give them a shiny look. Refrigerate the tart until ready to serve.

Serve the Tart:

  • Place the tart pan on top of a large can (the 28-ounce tomato cans are good) so that the bottom balances midair as the rim falls to the counter. Use the metal spatula to transfer the tart to a serving plate, or simply leave the bottom of the tart pan under the tart for support. Slice the tart with a thin and sharp knife, cutting down in one quick motion rather than sawing. This tart is lovely all by itself, though a spoonful of raspberry sauce is a good accompaniment.

Vanilla Bean Pastry Cream

Part of a classic fruit tart class that I took a few years back at Sur La Table. “A classic filling for fresh fruit tarts, èclairs, and cream pies, pastry cream is really just a flour-thickened custard sauce, which also means that it can take on a near-endless variety of flavorings, from spices and citrus to chocolates and liqueurs.” Makes 2 Cups.

Ingredients

  • 1½ cups whole milk
  • 1 vanilla bean (or 1½ teaspoons pure vanilla extract)
  • 1 large egg
  • 2 large egg yolks
  • 6 tablespoons sugar
  • ¼ cup all-purpose flour
  • 2 tablespoons (1 ounce) cold unsalted butter

Cooking Directions

  • Fill the large bowl halfway with ice and water and set it aside. Pour the milk into the medium saucepan. Use the tip of a paring knife to cut the vanilla bean in half lengthwise. Turn the knife over and use the dull side to scrape the seeds into the saucepan, then add the pod. Heat until the mixture just begins to simmer. Remove from the heat and let steep for 30 minutes. (If using vanilla extract instead of a vanilla bean, skip this step and add the extract later.)
  • Heat the milk to just below the boiling point and remove from the heat. In a medium bowl, whisk together the egg, egg yolks, and sugar until well blended and smooth. Add the flour and whisk vigorously until the mixture is very smooth. Pour about ½ cup of the hot milk into the yolk mixture, whisking constantly to temper the yolks. Slowly pour the yolk mixture back into the hot milk, whisking all the while.
  • Heat the mixture, whisking constantly to prevent the flour from lumping, until it reaches a boil. Continue to cook and whisk for another minute, until the pastry cream is very thick. Remove from the heat and whisk in the butter (and vanilla extract, if using). Strain the pastry cream through the strainer set over a medium bowl to remove any lumps or tiny bits of egg. (Save the vanilla bean: Rinse it thoroughly, allow to dry, then use it to make vanilla sugar).
  • Press a piece of plastic wrap directly on the surface of the pastry cream, then set the bowl into the bowl of ice water. Once the pastry cream has completely cooled, use or store in the refrigerator until needed.

Vanilla Shortcrust Dough

Part of a classic fruit tart class that I took a few years back at Sur La Table. Recipe makes enough dough for a 9″ to 9 1/2″ pan.

Ingredients

  • 1¼ cups all-purpose flour
  • ¼ cup sugar
  • ¼ teaspoon salt
  • 1 stick (4 ounces) cold unsalted butter, cut into ½-inch pieces
  • 2 large egg yolks
  • 2 teaspoons pure vanilla extract
  • 1 to 3 teaspoons water

Cooking Directions

  • To mix the dough using a food processor: Place the flour, sugar, and salt in the bowl of a food processor. Pulse 5 times to blend. Add the cold butter pieces and pulse 6 to 8 times, just until the butter is the size of large peas. In the small bowl, whisk together the egg yolks, vanilla, and 1 teaspoon water. Add to the butter mixture, then process just until the dough begins to form small clumps, 5 to 10 seconds. Do not let the dough form a ball. Test the dough by squeezing a handful of clumps-when you open your hand, they should hold together. If they are crumbly and fall apart, sprinkle 1 teaspoon water over the dough and pulse several times, then test again. Repeat, if necessary.
  • To mix the dough by hand: Place the flour, sugar, and salt in the medium bowl and blend well with the whisk. Add the cold butter pieces and toss until they are lightly coated with the flour. Use the pastry blender or your fingertips to cut the butter into the flour until the mixture resembles bread crumbs or crushed crackers. If at any time during this process the butter softens and becomes warm, place the bowl in the freezer for 10 minutes before continuing. In the small bowl, whisk together the egg yolks, vanilla, and 1 teaspoon water. Add to the dry ingredients and toss between your fingertips or with a fork 20 to 30 times to evenly distribute the moisture. The dough will still look very crumbly, but if the mixture is squeezed in your hand, it should hold together. If not, sprinkle another teaspoon of water over the top and toss to blend. Repeat, if necessary.
  • Finish the dough: Turn the dough out on a lightly floured work surface and knead gently 2 or 3 times, just to finish bringing it together. Shape it into a disk about 6 inches in diameter. If the dough is still cool to the touch, continue on to the next step. If the dough is soft and sticky, wrap it in plastic and refrigerate for 30 minutes before continuing.
  • To make the tart shell: Make sure the dough is cool but malleable. If it has been refrigerated or frozen and is quite hard, let it sit on the counter for 10 to 12 minutes before rolling. Place the dough disk between two 14-inch pieces of waxed paper, parchment paper, or plastic wrap. Roll it into an 11-inch round, rotating it (and the paper) clockwise slightly after each roll to create an even round. Remember to roll from the center outward and to lift the rolling pin at the edge to avoid smashing the edge into the paper, which will make removing the paper difficult.
  • As you roll, the paper or plastic wrap will get wrinkled into the dough. When this happens, peel it off, smooth out the wrinkles and lay it back on the dough. Flip the dough over and repeat, if necessary, with the top piece. Continue to roll, flipping and smoothing wrinkles as necessary, until the dough is 11 inches across and between ⅛ and ¼ inch thick. If the dough is soft and sticky, transfer it to a baking sheet and chill it for 30 minutes. Peel off the top piece of paper or plastic. Leave the bottom piece attached. Lift the dough by the exposed paper or plastic and flip it over and center it over the tart pan as best you can.
  • Peel off the paper or plastic. Ease the dough across the bottom of the pan and up the sides, pressing it into the corners of the pan with your fingertips. Once the dough is even in the pan, fold the excess dough at the edge inward to create a double layer of dough along the wall. Press firmly with your thumbs to fuse the two layers of dough, then roll your thumb over the rim of the pan to remove any excess dough there. Refrigerate for 1 hour or freeze for 30 minutes before baking.

Cabbage Roll Soup

I have been craving Cabbage rolls as a simple comfort food, but they take a lot more time then I wanted to invest into making them since I am the only person who like to eat them. Found this recipe for cabbage roll soup here and tweaked it to my liking.

Ingredients

  • 1lb Ground Beef
  • 7 Cups Beef Broth
  • 28 oz Can Diced Tomatoes
  • 3 Cups or 1 Jar Tomato Sauce
  • 1 Yellow Onion, diced
  • 1 Cup White Rice
  • 1 Tbsp Oregano
  • 1 Tbsp Basil
  • 3 Tbsp Worcestershire Sauce
  • 4 Cloves of Garlic
  • 1 Tsp Paprika
  • Salt and Pepper to taste
  • 3 Cups or 1 Half head of cabbage, shredded

Cooking Directions

  1. In a large stock pot/dutch oven, add 1-2 Tbsp olive oil. To that add ground beef and diced onion. Cook until onion becomes translucent.
  2. Add remaining ingredients, bring to a boil and reduce heat to medium-low to low and simmer for at least 1 hr. For best results simmer for 2-3 hours. Turn heat off and remove pot from stove and allow to cool for 10 min before serving.

Chicken Pot Pie Casserole

Found the recipe on Tiktok of all places and modified it to my liking. Definitely not good for you, but very good for your soul!

Ingredients

  • 1 Pkg Red Lobster Cheddar Biscuit mix
  • 2 Cups Milk
  • 1 Cup Shredded Cheddar cheese or Mexican Blend
  • 1 Cup Butter, melted
  • 1 Can Peas and Carrots mix (14.5 oz); see note at bottom of page
  • 1 Can Cream of Chicken Soup 10.5 oz
  • 1 Cup Chicken broth
  • 1 Rotisserie Chicken, Shredded (I use the skin and drippings as well)
  • 1 Tsp Onion Powder
  • 1 Tsp Garlic Powder
  • 1 Tsp Thyme

Cooking Directions

  1. Melt butter and pour into the bottom of a 8×13 casserole dish. Then add shredded chicken on top of that, then add peas and carrots on top of the chicken.
  2. Combine the package of cheddar biscuit mix with the seasoning pack (included in package), thyme, garlic and onion powder. Then mix with the 2 Cups of milk. Pour, do not mix, this mixture over the chicken and vegetables.
  3. Mix 1 can of Cream of Chicken soup with 1 cup of chicken broth. Pour, do not mix, over the top. Sprinkle the shredded cheese on the top.
  4. Place into a 350°F oven, and bake for 1 hr. Allow to cool for 5-10 min before serving. (If it looks wet in the middle that is okay. it should look like baked biscuits on the top and be a creamy thick soup texture in the middle. )

Notes: If you prefer you can use a bag of frozen peas and carrots. I could not find one at the local store when I went to make this, all of them were Pea, Carrot, and Corn mixes. The corn didn’t sound right for chicken pot pie to me. You might have to also bake longer since the vegetables are frozen so at the 1 hr marker check for doneness.

Italian Wedding Soup

Italian Comfort food at its best!

Ingredients

  • 2 Eggs, Lightly beaten
  • 1/3 Cup grated Parmesan Cheese
  • 1/4 Cup Dry bread Crumbs
  • 2 Tbsp minced fresh parsley
  • 2 Tbsp milk (2%)
  • 4 Garlic cloves
  • 4 Tsp grated onion
  • 1 Tsp salt
  • 1 Tsp pepper
  • 1/2 Tsp grated lemon peel/zest
  • 1 1/2 Lbs ground chicken/turkey

Soup

  • 2 Tbsp olive oil
  • 4 medium carrots, chopped
  • 4 Celery Ribs, chopped
  • 2 Small onions, chopped
  • 6 Garlic cloves, minced
  • 4 Cartons (26 oz ea.) Chicken Stock
  • 1 Tsp Salt
  • 1 Tsp Pepper
  • 1 1/2 Cups Acini di pepe pasta
  • 2 Pkg (10 oz ea.) fresh spinach
  • Additional minced fresh parsley and grated Parmesan cheese

Cooking Directions

  1. In a large bowl, combine the first 10 ingredients. Add chicken; mix lightly but thoroughly. Shape into 1″ balls.
  2. For soup, in a stock pot, heat oil over medium-high heat. Add carrots, celery and onions; cook and stir 6-8 mins or until onions are tender.
  3. Stir in stock, salt and pepper; bring to a boil. Drop meatballs into soup; cook, uncovered 10 minutes. Gently stir in pasta; cook 10-12 minutes longer or until meatballs are cook through and pasta is tender.
  4. Stir in spinach. Top servings with parsley and cheese.

Cream Cheese Sugar Cookies

Yummy and fun to decorate!

Ingredients

  • 1 Cup white sugar
  • 1 Cup butter, softened
  • 1 (3 oz) package cream cheese, softened
  • ½ Tsp salt
  • ½ Tsp almond extract
  • ½ Tsp vanilla extract
  • 1 Egg yolk
  • 2 ¼ Cups all-purpose flour

Cooking Directions

1. In a large bowl, combine the sugar, butter, cream cheese, salt, almond and vanilla extracts, and egg yolk. Beat until smooth. Stir in flour until well blended. Chill the dough for 8 hours, or overnight.

2. Preheat oven to 375 degrees F (190 degrees C).

3. On a lightly floured surface, roll out the dough 1/3 at a time to 1/8 inch thickness, refrigerating remaining dough until ready to use. Cut into desired shapes with lightly floured cookie cutters. Place 1 inch apart on ungreased cookie sheets. Leave cookies plain for frosting, or brush with slightly beaten egg white and sprinkle with candy sprinkles or colored sugar.

4. Bake for 7 to 10 minutes in the preheated oven, or until light and golden brown. Cool cookies completely before frosting.

Beef Stew in Red Wine

Beef stew in itself is amazing, add wine and it becomes better! Thanks to Jacques Pepin for the original recipe! Original recipe found here!

Ingredients

  • 1 Tbsp unsalted butter
  • 2 Tbsp Olive oil
  • 2 Lbs trimmed beef flatiron steak or chuck, cut into 8 pieces
  • Salt
  • Freshly ground black pepper
  • 1 Cup finely chopped onion
  • 1 Tbsp finely chopped garlic
  • 1 Tbsp all-purpose flour
  • One 750-milliliter bottle dry red wine (Menage a Trois: Midnight)
  • 2 bay leaves
  • 1 Thyme sprig
  • One 5-oz piece of Pancetta
  • 15 pearl or small cipollini onions, peeled
  • 15 Cremini mushrooms
  • 15 baby Carrots, peeled
  • Sugar
  • Chopped fresh parsley, for garnish

Cooking Directions

  1. Preheat the oven to 350°. In a large enameled cast-iron casserole, melt the butter in 1 tablespoon of the olive oil. Arrange the meat in the casserole in a single layer and season with salt and pepper. Cook over moderately high heat, turning occasionally, until browned on all sides, 8 minutes. Add the chopped onion and garlic and cook over moderate heat, stirring occasionally, until the onion is softened, 5 minutes. Add the flour and stir to coat the meat with it. Add the wine, bay leaves and thyme, season with salt and pepper and bring to a boil, stirring to dissolve any brown bits stuck to the bottom of the pot.
  2. Cover the casserole and transfer it to the oven. Cook the stew for 1 1/2 hours, until the meat is very tender and the sauce is flavorful.
  3. Meanwhile, in a saucepan, cover the pancetta with 2 cups of water and bring to a boil. Reduce the heat and simmer for 30 minutes. Drain the pancetta and slice it 1/2 inch thick, then cut the slices into 1-inch-wide lardons.
  4. In a large skillet, combine the pancetta, pearl onions, mushrooms and carrots. Add the remaining 1 tablespoon of olive oil, 1/4 cup of water and a large pinch each of sugar, salt and pepper. Bring to a boil, cover and simmer until almost all of the water has evaporated, 15 minutes. Uncover and cook over high heat, tossing, until the vegetables are tender and nicely browned, about 4 minutes.
  5. To serve, stir some of the vegetables and lardons into the stew and scatter the rest on top as a garnish. Top with a little chopped parsley and serve.

Chicken and Dumplings

One of my favorite comfort foods, as my buddy Boyd would say, “It’s stick to your ribs good!”

Ingredients

  • 2 Cups Flour
  • 1/2 Tsp Baking powder
  • 1 pinch Salt
  • 2 Tbsp butter
  • 1 Cup milk
  • 2 Qts Chicken broth
  • 3 Cups cooked chicken (preferably leftover rotisserie chicken)

Cooking Directions

1. In a bowl combine the flour, baking powder, and salt. Cut the butter into the dry ingredients with a fork or pastry blender. Stir in the milk, mixing with a fork until the dough forms a ball.

2. Heavily flour a work surface. You’ll need a rolling pin and something to cut the dumplings with. I like to use a pizza cutter. I also like to use a small spatula to lift the dumplings off the cutting surface.

3. Roll the dough out thin with a heavily floured rolling pin. Dip your cutter in flour and cut the dumplings in squares about 2×2-inches each. It’s okay for them not to be exact. Just eye ball it. Some will be bigger, some smaller, and some might be shaped funny.

4. Use the floured spatula to put them on a heavily floured plate. Just keep flouring between the layers of dumplings.

5. To cook them, bring the broth to a boil. Drop the dumplings in one at a time, stirring while you add them. The extra flour on them will help thicken the broth.

6. Cook them for about 15 to 20 minutes or until they don’t taste doughy.

7. Add the cooked chicken to the pot and serve.